
How to Calibrate a Micropipette: A Step-by-Step Guide
A micropipette that has drifted even slightly from its specified volume can affect the reliability of an entire laboratory procedure. In applications such as PCR, diagnostic testing, pharmaceutical analysis, sample preparation, reagent dispensing, and quantitative research, small volume errors can lead to failed reactions, inconsistent replicates, inaccurate concentrations, and unreliable analytical results.
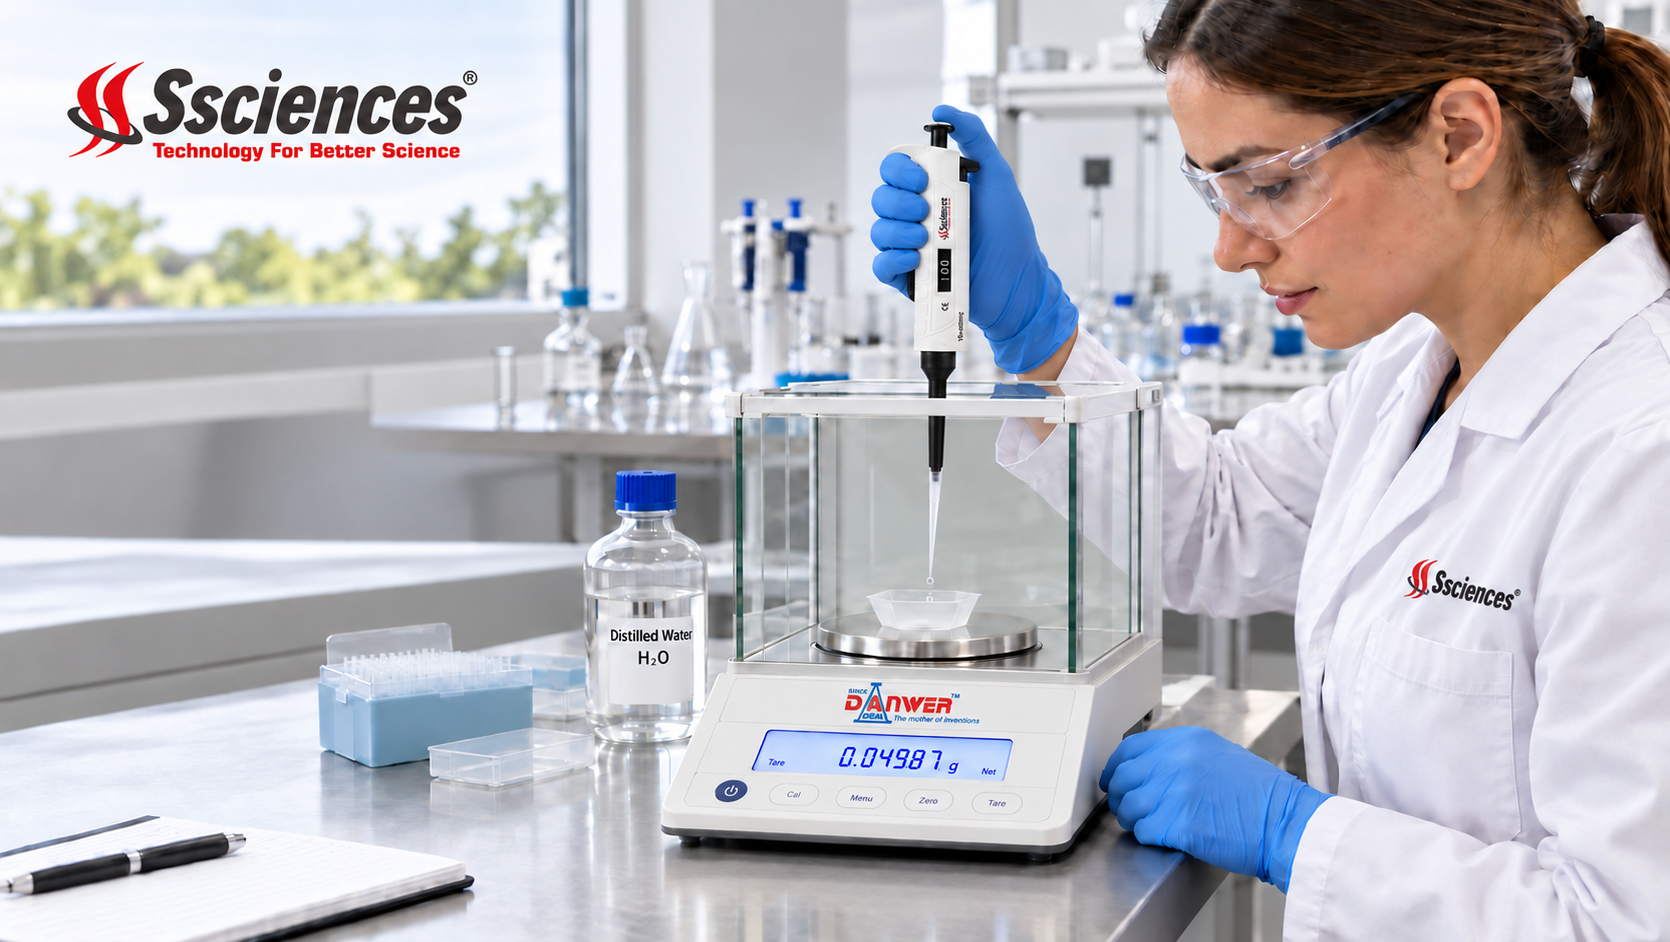
That is why understanding how to calibrate a micropipette is an important part of laboratory quality control.
Micropipette calibration helps confirm whether an instrument is delivering the volume selected by the operator with acceptable accuracy and precision. One of the most widely used approaches is the gravimetric calibration method, in which purified water is dispensed, weighed on an analytical balance, and converted from mass to volume using an appropriate correction factor.
This guide explains how to calibrate a micropipette through a practical gravimetric calibration method using an analytical balance, distilled water, and controlled test conditions.
Knowing how to calibrate a micropipette helps laboratories maintain accurate liquid handling, improve repeatability, and support dependable test results.
Follow the steps below to understand how to calibrate a micropipette and evaluate its accuracy and precision.
Why Micropipette Calibration Is Important
Micropipettes are precision liquid-handling instruments. Although a pipette may look perfectly normal externally, components inside the instrument can gradually wear with repeated use.
Seals may deteriorate, O-rings can lose their effectiveness, springs can weaken, pistons can wear, and operating technique can vary between users.
These changes may result in volume errors that are not immediately visible.
Two different performance characteristics therefore need to be evaluated during micropipette calibration:
Accuracy
Accuracy refers to how closely the average volume delivered by the micropipette matches the volume selected by the user.
For example, if a micropipette is set to 100 µL but repeatedly delivers approximately 97 µL, the instrument has a systematic volume error.
This is commonly referred to as systematic error or bias.
Precision
Precision refers to how closely repeated dispensing results agree with one another.
A micropipette might repeatedly deliver:
97.0 µL
97.1 µL
96.9 µL
97.0 µL
These results are highly consistent, meaning the pipette may have good precision, but because the target was 100 µL, it would still have poor accuracy.
Conversely, a pipette could produce an average close to 100 µL while individual measurements vary considerably. In that situation, average accuracy may appear acceptable while precision is poor.
A reliable micropipette therefore needs both acceptable accuracy and acceptable precision.
How Often Should a Micropipette Be Calibrated?
There is no single calibration interval suitable for every laboratory.
The appropriate pipette calibration frequency depends on factors including:
- Frequency of micropipette use
- Criticality of the application
- Number of users operating the instrument
- Laboratory quality procedures
- Historical calibration performance
- Regulatory or accreditation requirements
A practical starting point may look like this:
| Laboratory Environment | Typical Calibration Interval |
|---|---|
| High-volume clinical or diagnostic laboratory | Every 3 months or more frequently |
| GMP-regulated pharmaceutical laboratory | Every 3–6 months |
| General research or academic laboratory | Every 6–12 months |
| Low-use or specialty micropipette | Approximately annually with interim checks |
These intervals should be treated as general guidance rather than universal rules.
A micropipette used dozens or hundreds of times every day for a critical diagnostic procedure will normally require closer monitoring than an instrument used occasionally for general buffer preparation.
Similarly, a laboratory should consider its own calibration history.
If a particular micropipette repeatedly shows signs of drift, its calibration interval may need to be shortened.
What You Need to Calibrate a Micropipette
A basic gravimetric micropipette calibration requires controlled equipment and environmental conditions.
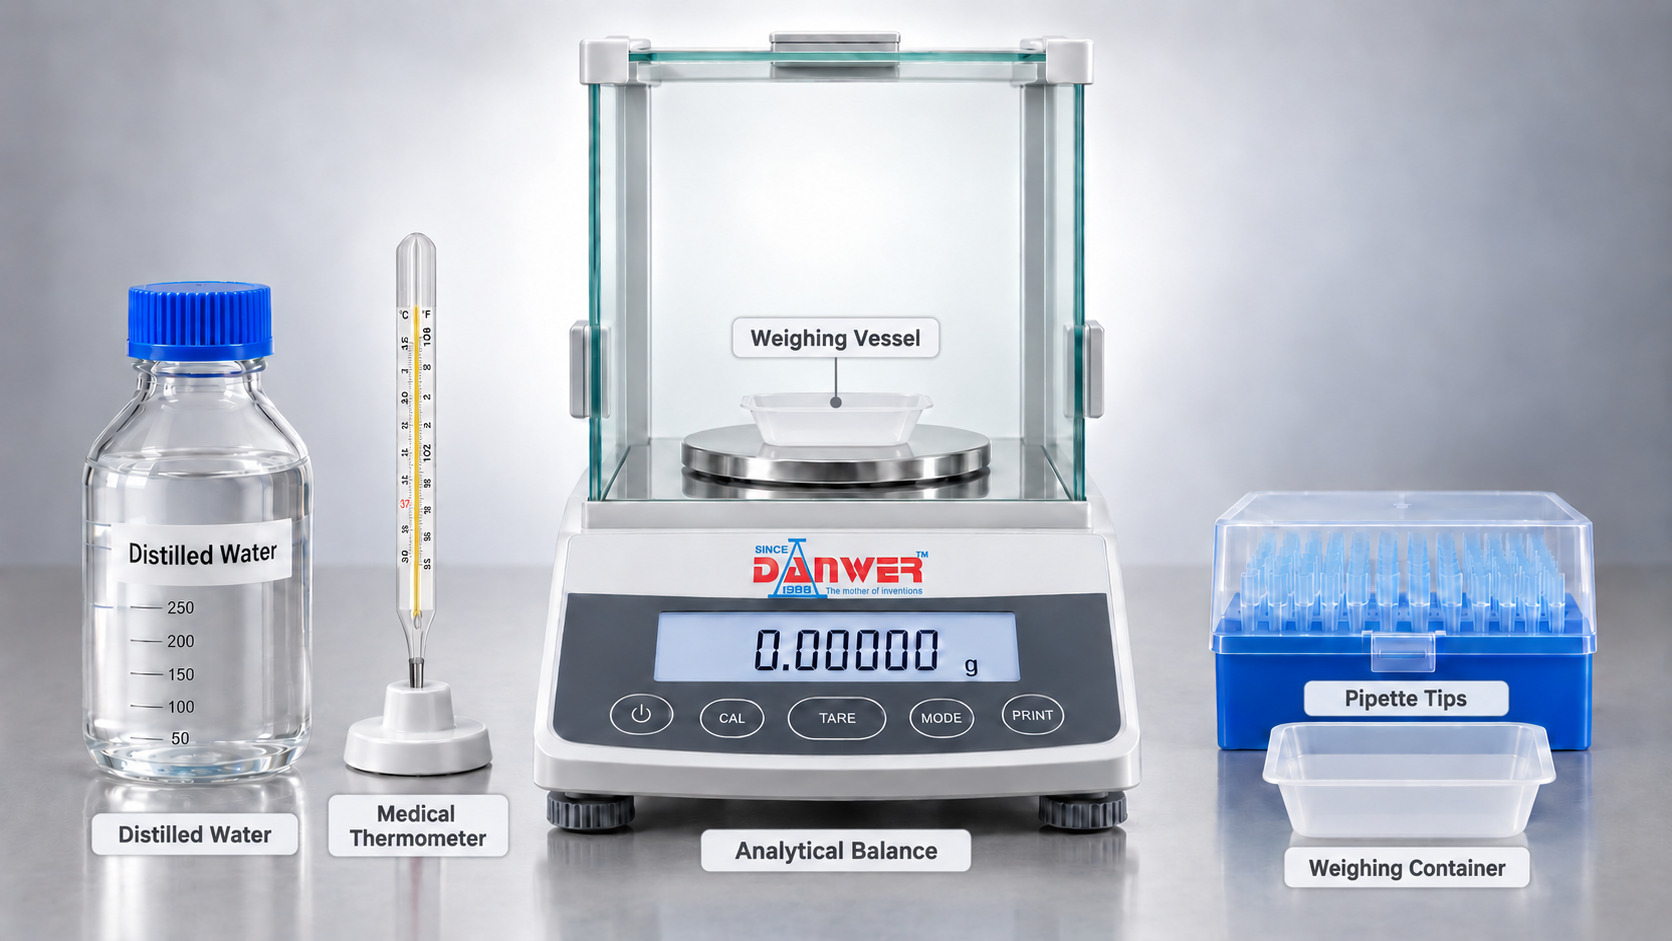
Analytical Balance
Use an analytical balance with sufficient readability for the volume being tested.
For smaller micropipette volumes, particularly below approximately 100 µL, a balance with suitable high-resolution readability is important because even a very small mass difference can represent a meaningful volume difference.
Distilled or Deionized Water
Use clean distilled or deionized water suitable for calibration testing.
The water should be allowed to reach thermal equilibrium with the testing environment.
Calibrated Thermometer
Water temperature must be measured because the relationship between water mass and volume changes with temperature.
The recorded temperature is used when selecting the appropriate Z-factor.
Weighing Vessel
A suitable weighing vessel should be used to receive the dispensed water.
For small volumes, evaporation can affect the measured result, so an evaporation trap or covered weighing vessel may be useful.
Correct Pipette Tips
Use tips designed to properly fit the micropipette.
An incorrectly fitting tip may create an imperfect seal, potentially causing air leakage and under-delivery.
Stable Test Environment
The micropipette, tips, water, weighing vessel, and other relevant equipment should be allowed to equilibrate in the same testing environment before calibration begins.
Temperature differences between the liquid, pipette, and environment may introduce measurement error.
How to Calibrate a Micropipette Using the Gravimetric Method
The gravimetric calibration method determines delivered volume by weighing purified water and converting the recorded mass into volume.
Here is the process step by step.
Step 1: Allow the Equipment to Equilibrate
Place the:
- Micropipette
- Pipette tips
- Calibration water
- Weighing vessel
in the test environment long enough for them to reach similar temperature conditions.
Testing equipment immediately after moving it from a substantially warmer or colder environment can produce misleading results.
Step 2: Select the Calibration Test Volumes
For variable-volume micropipettes, performance should be assessed at multiple points across the usable volume range.
Typical calibration points include:
- Maximum or nominal volume
- Approximately 50% of the nominal volume
- Lower usable volume
For example, a variable micropipette covering a broad range should not be evaluated only at its maximum setting because performance can differ at lower volumes.
A fixed-volume micropipette is evaluated at its specified fixed volume.
For multichannel micropipettes, each channel should be evaluated because one channel may perform differently from the others.
Step 3: Fit the Correct Tip
Attach a compatible micropipette tip securely.
The tip must create a proper seal with the tip cone.
Poorly fitted, damaged, contaminated, or incompatible tips can introduce dispensing errors even when the micropipette itself is functioning correctly.
Step 4: Pre-Wet the Pipette Tip
Before recording measurements, aspirate and dispense the calibration water approximately two or three times.
Pre-wetting helps condition the internal air space and tip surface and can reduce variation associated with the first aspiration using a fresh tip.
Step 5: Aspirate the Selected Volume
Set the micropipette to the required test volume.
Press the plunger correctly to the aspiration position, immerse the pipette tip appropriately in the liquid, and release the plunger smoothly.
Avoid rapid, inconsistent plunger movement.
Ensure that no visible air bubbles are present in the aspirated liquid.
Step 6: Dispense the Water Into the Weighing Vessel
Dispense the aspirated water into the weighing vessel.
Record the mass shown by the analytical balance promptly because evaporation can influence small-volume measurements.
Repeat the process consistently.
For a formal test based on the approach described in ISO 8655 reference procedures, repeated measurements are required rather than relying on a single dispense.
A commonly used test procedure involves 10 replicate measurements at each selected test volume.
Step 7: Record the Water Temperature
Measure and record the temperature of the calibration water.
Do not simply assume that water temperature is identical to the displayed room temperature.
This measurement is needed to determine the appropriate conversion factor.
Step 8: Convert Water Mass Into Volume Using the Z-Factor
The balance records the mass of dispensed water, while the micropipette needs to be evaluated according to delivered volume.
A Z-factor is therefore used to convert the measured mass into volume while accounting for factors including water density and air buoyancy.
The simplified calculation is:
Delivered Volume = Measured Mass × Z-Factor
At around 20°C, the Z-factor is approximately 1.0032 µL/mg, although the correct value should be selected according to the actual measured conditions and the calibration procedure being followed.
—
Step 9: Calculate Micropipette Accuracy
Once the individual measured volumes have been calculated, determine the average delivered volume.
Systematic error can be represented as:
Systematic Error = Mean Delivered Volume − Set Volume
For example:
Set volume = 100 µL
Average measured volume = 98.6 µL
Systematic error:
98.6 − 100 = −1.4 µL
Percentage systematic error:
−1.4
This means the pipette is consistently delivering less than the selected volume.
Step 10: Calculate Micropipette Precision
Precision is evaluated from the variation between repeated measurements.
The standard deviation of the measurements can be calculated, and the result may also be expressed as a coefficient of variation (CV).
A simplified CV calculation is:
CV (%) = Standard Deviation ÷ Mean Volume × 100
For example:
Mean volume = 98.6 µL
Standard deviation = 0.4 µL
CV:
0.4 ÷ 98.6 × 100 ≈ 0.4
The smaller the variation between repeated measurements, the better the precision.
Step 11: Compare Results With the Permissible Error
The calculated systematic and random errors should be compared with the applicable maximum permissible error (MPE) for the pipette and test volume.
Representative reference values for common air-displacement pipette volumes may appear approximately as follows:
| Nominal Volume | Systematic Error Limit | Random Error Limit |
|---|---|---|
| 10 µL | ±0.12 µL (±1.2%) | ≤0.08 µL (≤0.8%) |
| 200 µL | ±1.6 µL (±0.8%) | ≤0.6 µL (≤0.3%) |
| 1000 µL | ±8.0 µL (±0.8%) | ≤3.0 µL (≤0.3%) |
Important: Exact permissible limits can depend on pipette type, volume, applicable standard, test procedure, and product specification. Always verify the applicable specification for the micropipette being tested.
Micropipette Calibration Example
Suppose a micropipette is set to:
100 µL
After 10 measurements, the average calculated volume is:
98.6 µL
Standard deviation:
0.4 µL
Accuracy Calculation
98.6 − 100 = −1.4 µL
Percentage systematic error:
−1.4%
Precision Calculation
0.4 ÷ 98.6 × 100 ≈ 0.4% CV
If the allowed systematic error were ±0.8% while the random error limit were 0.6%, this example would indicate that the pipette is precise but not sufficiently accurate.
The instrument is repeatedly producing similar results, but those results are consistently below the selected volume.
This type of pattern can help identify whether the problem is likely related to instrument condition or operator technique.
Common Reasons a Micropipette Fails Calibration
A micropipette can fail calibration even when there is no visible external damage.
The causes generally fall into two groups:
1. Mechanical issues
2. Technique or handling issues
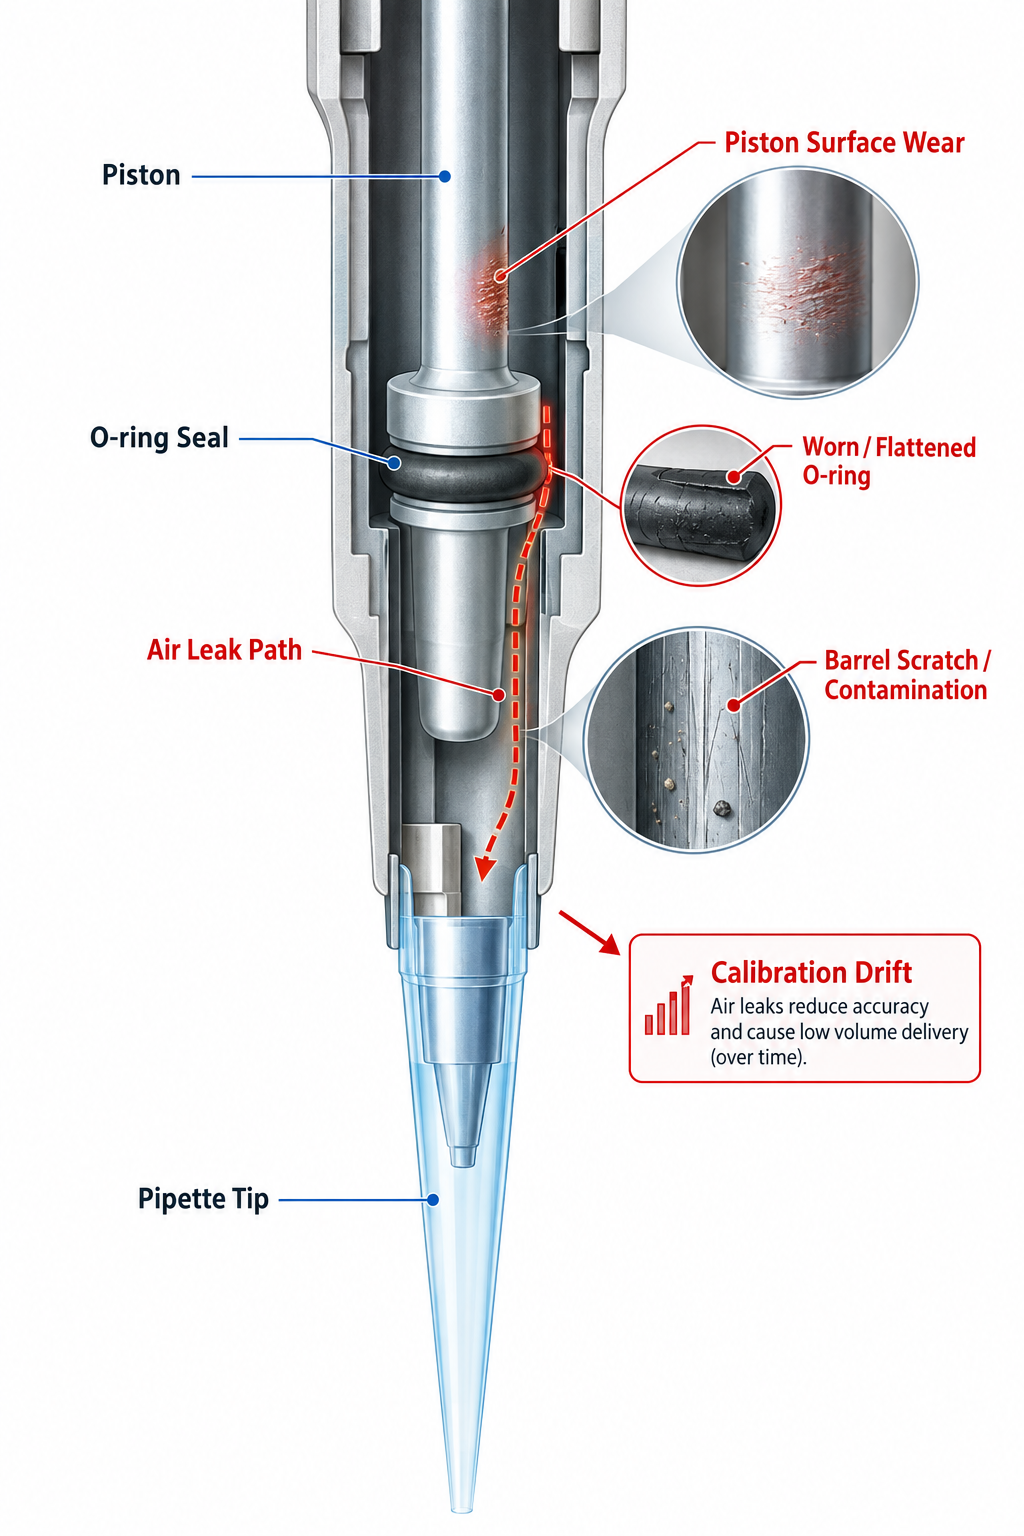
Worn Seals and O-Rings
Seals and O-rings help maintain the pressure conditions required for accurate aspiration and dispensing.
When they become worn, dry, damaged, or contaminated, small air leaks can occur.
This may result in incorrect delivered volume.
Piston or Plunger Wear
Repeated operation gradually places mechanical stress on the piston and plunger components.
Wear can affect smooth movement and therefore influence aspiration or dispensing performance.
Spring Fatigue
The internal spring plays an important role in plunger operation.
A weakened spring can affect return action and contribute to inconsistent dispensing.
Incorrect Aspiration Technique
Changing aspiration speed between measurements can significantly affect repeatability.
Operators should use consistent:
- Plunger pressure
- Aspiration speed
- Immersion depth
- Pipette angle
- Dispensing technique
Standardized pipetting technique is particularly important when working with small liquid volumes.
Wrong or Poorly Fitted Pipette Tips
The micropipette and tip work as one liquid-handling system.
If the tip does not seal correctly, air may enter between the tip and tip cone.
This can result in repeated under-delivery.
Using compatible, properly seated tips is therefore essential during both routine laboratory work and calibration testing.
Air Bubbles
Air bubbles in the aspirated liquid reduce the actual amount of liquid delivered.
At very small volumes, even a relatively small bubble can cause a significant percentage error.
Temperature Differences
Temperature influences:
- Water density
- Air volume
- Evaporation
- Pipetting behaviour
A cold liquid being handled by a micropipette equilibrated to a warm laboratory can produce errors unrelated to mechanical calibration.
Accuracy Failure vs Precision Failure
The pattern of calibration failure may provide clues about the underlying problem.
Poor Accuracy but Good Precision
If measurements remain tightly grouped but consistently above or below the target volume, possible causes include:
- Seal problems
- O-ring wear
- Piston-related issues
- Incorrect calibration adjustment
Poor Precision
If measurements vary substantially between repeated dispenses, check:
- Operator technique
- Tip fitting
- Aspiration speed
- Air bubbles
- Contamination
- Mechanical movement
This distinction can help laboratories troubleshoot the problem before replacing or servicing an instrument unnecessarily.
In-House Micropipette Check vs Certified Calibration
Both approaches have a role in laboratory quality management.
In-House Gravimetric Checks
An in-house gravimetric check can help laboratories:
- Identify calibration drift early
- Monitor instrument performance
- Maintain calibration history
- Detect damaged or poorly performing pipettes
- Decide when professional servicing may be required
Routine internal checks can therefore be valuable between scheduled formal calibrations.
However, an internal check should not automatically be treated as equivalent to accredited calibration where traceability or certification is required.
Certified Micropipette Calibration
Laboratories operating under regulated or formally accredited quality systems may require calibration performed by a competent external calibration laboratory with appropriate traceability.
Examples can include environments operating under requirements associated with:
- GMP
- GLP
- Diagnostic testing
- ISO/IEC 17025-based quality systems
- Other regulated laboratory procedures
Where a traceable calibration certificate is required for an audit, customer requirement, or regulatory process, an internal gravimetric check normally cannot replace the required formal certificate.
A practical laboratory strategy can therefore combine:
Routine in-house performance checks + scheduled certified calibration
with immediate investigation whenever a pipette fails an interim performance check.
Micropipette Calibration Checklist
Use this quick checklist before completing a gravimetric calibration test:
[ ] Pipette, tips, water, and equipment equilibrated to the test environment
[ ] Correct pipette tips selected and properly seated
[ ] Analytical balance suitable for the volume being measured
[ ] Calibration water suitable for testing
[ ] Water temperature measured and recorded
[ ] Correct Z-factor selected
[ ] Pipette tip pre-wetted 2–3 times
[ ] Repeated measurements recorded at each test volume
[ ] Variable micropipette checked at multiple volume settings
[ ] Every channel checked individually for a multichannel micropipette
[ ] Systematic error calculated
[ ] Random error or precision calculated
[ ] Results compared with applicable permissible limits
[ ] Calibration results recorded in the instrument’s history
Frequently Asked Questions About Micropipette Calibration
How often should a micropipette be calibrated?
Calibration frequency depends on how frequently the micropipette is used, how critical its application is, regulatory requirements, number of operators, and previous calibration history.
High-volume clinical or diagnostic laboratories may check instruments approximately every three months, GMP-regulated laboratories may use intervals of three to six months, while general research laboratories may use six- to twelve-month schedules.
The laboratory’s own documented performance history should ultimately guide the calibration interval.
Can I calibrate a micropipette myself?
Routine gravimetric performance checks can be conducted in-house when suitable equipment and procedures are available.
However, laboratories requiring accredited or traceable calibration documentation may need calibration from an appropriately accredited external calibration laboratory.
What Is the Z-Factor in Pipette Calibration?
The Z-factor converts the measured mass of dispensed water into delivered volume.
It accounts for factors including water density and air buoyancy at the measured temperature.
At approximately 20°C, the value is around 1.0032 µL per mg, although the appropriate factor should always be selected for the actual test conditions.
Why Does My Micropipette Fail Calibration Even Though It Looks Fine?
Internal components can deteriorate without visible external damage.
Possible causes include:
- Worn piston seals
- Damaged O-rings
- Spring fatigue
- Piston wear
- Poorly fitting tips
- Operator technique
- Temperature differences
A micropipette can therefore appear normal while still delivering inaccurate liquid volumes.
What Is the Difference Between Accuracy and Precision in a Micropipette?
Accuracy describes how close the average delivered volume is to the selected volume.
Precision describes how closely repeated measurements agree with each other.
Both need to be evaluated independently because a micropipette can be precise but inaccurate or accurate on average while having poor precision.
Choosing the Right Micropipette for Long-Term Accuracy
Regular calibration matters, but long-term performance also depends on the micropipette’s quality and design.
Factors such as:
- Piston mechanism
- Seal quality
- Component durability
- Tip compatibility
- Autoclavability requirements
- Manufacturing consistency
can influence how well a micropipette maintains its performance during routine laboratory use.
SSCIENCES offers micropipette options for different laboratory requirements, including the Science Plus Model – Semi-Autoclavable and FAC Plus – Fully Autoclavable ranges.
Laboratories that routinely sterilize equipment may require a pipette designed to tolerate those conditions, while laboratories with less demanding sterilization procedures may prefer a semi-autoclavable configuration.
Explore the right micropipette for your lab from our complete micropipette range.
SSCIENCES micropipettes are manufactured under our ISO 9001:2015 and ISO 13485:2016 certifications, supporting our commitment to consistent manufacturing and quality management.
Whether you need a single-channel micropipette, fixed-volume pipette, variable-volume pipette, or multichannel solution, choosing an instrument that fits your workflow is key to reliable liquid-handling performance.
Talk to our team to discuss your laboratory requirements and find the right micropipette for your application.
Top Brand Micropipette – SSCIENCES Micro Laboratory Pipette Price in India – Buy SSCIENCES Micro Laboratory Pipette online at Flipkart.com